
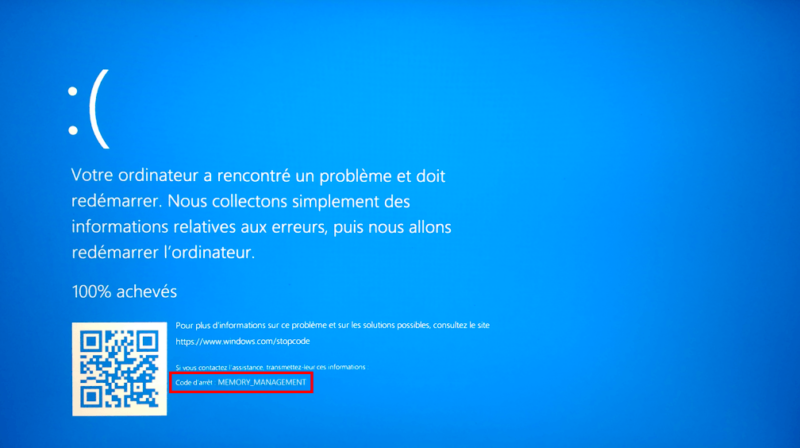
If you are using a Windows 10 system and have been encountering the stop code memory management error, then don’t worry. You are not alone because this issue is quite common among Windows users. Although there are many possible reasons for this problem, we have listed down some of them in this article and also provided their solutions to help you resolve it successfully.
The Process of Fixing Memory Management Stop Code
The process of fixing the Memory Management stop code is very easy. However, it may be time-consuming and frustrating if you don’t know what to do or where to start. So here are some tips on how you can fix this error in Windows 10:
- The first thing to do is check your RAM (Random Access Memory). If there’s no problem with your RAM, then try re-installing or updating your drivers for both graphics card and motherboards.
- If there’s no driver problem, then restarting the computer might help since restarting your computer resets all hardware settings back to its original state before shutting down the system. This will allow you to make sure whether the issue still persists after rebooting.
- Also run a virus scan using an antivirus software such as Avast Antivirus 2019 (Free Download) as malware infection can also cause this issue in some cases; although it’s rare but possible as well!
Method 1: Check RAM and Hard Drive Health
- Check RAM and Hard Drive Health
Before you start your PC, one of the first things to do is check its RAM and hard drive health. The RAM is the main component of your computer that stores data. It can be accessed by both your CPU and GPU (graphics processing unit) in order to process information quicker than they could without it.
The RAM is located on the motherboard, which is a circuit board installed inside your computer case or tower (the box/cabinet that contains all of its components). You can access this by removing some screws, then turning off power before opening up your computer case or tower’s front panel so that no electricity runs through any cables while they are disconnected from their sockets on either end (this will prevent damage if any static electricity builds up while they’re unplugged). If there’s already a cover protecting where it’s located then just remove said cover before proceeding further down below this point!
Method 2: Run SFC Scanner
- Open Command Prompt as Administrator.
- Type in the following command and press Enter: ‘SFC /scannow’
This command will scan all protected Windows files for corruption, and replace incorrect versions with correct Microsoft versions if necessary.
Method 3: Update Your Device Drivers
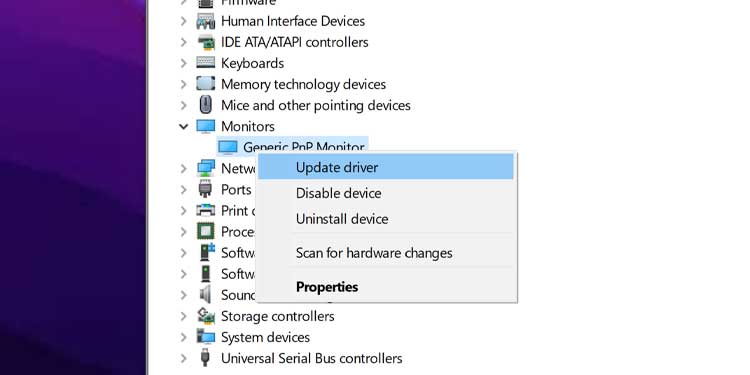
- To update device drivers, you need to open Device Manager. To do this, press Windows+R on your keyboard and type devmgmt.msc in the Run dialog box and then press Enter key.
- In the Device Manager window, expand “Ports” and right-click on any of them (USB Root Hub, for example). Select Properties from the drop-down menu that appears.
- In the Properties window that opens up next, click Driver tab at its top section. From within here, click Update Driver button under Driver Installation section of this window to start searching for updated driver files from respective manufacturers’ websites or from Windows Update servers if no newer version exists yet there on their company’s servers but still one has been released by another manufacturer since last time it was downloaded for installation purposes (this may seem confusing because how can there be an older version when we’re talking about updating it? Well…it happens).
- When you’ve found what seems like exactly what needs updating – assuming everything else checks out fine otherwise – click Next until installation completes successfully without any issues during which some programs may need restarting before they’re able to work properly again after being stopped while installing updates onto them as well as making sure all other important functions are running smoothly without any known problems detected during testing processes being carried out at same time when updating drivers; otherwise contact us so we can help resolve these issues remotely if needed via remote desktop connection service!
Method 4: Run Windows Memory Diagnostics Tool
- Open the Start menu by clicking the Windows logo in the lower-left of your screen, then type ‘memory’ into the search box and select “Windows Memory Diagnostic Tool.”
- Click “Restart now and check for problems (recommended).” If you have a desktop PC, make sure that it’s plugged in before you click this option.
- The tool will run through several tests to check whether there’s an issue with your RAM, hard drive or other components of your system; if everything checks out when it finishes running these tests, restart your computer normally to finish booting up Windows again
Method 5: Reinstall Windows 10 on Your System
Finally, if you are still not able to fix the error: “You may need to reinstall Windows 10 due to a memory management error in Windows 10”, then you should reinstall Windows 10 on your system. To do so:
- First of all, turn off your computer.
- Then restart your PC and enter into UEFI or BIOS configuration (this depends on the motherboard manufacturer).
- Find an option related to how much RAM your computer can use. In most cases it is located under the Advanced Options section or Memory Configuration section with names such as Accelerate Performance or Maximum Memory Access Timeout options etc…
- Change this setting from Auto to Manual and change the value according to what type of RAM you have installed in your machine. For example if you have 2GB DDR3 RAM installed then set its value as 800MHz or 1600MHz depending upon whether it is DDR3L or DDR3 SDRAM respectively (the best option would be 800MHz).
Final Words
Memory management errors are caused by a number of factors, such as faulty RAM or a damaged hard drive. In some cases, the cause is memory corruption—a result of failing to terminate programs properly before shutting down your computer.
When this type of error occurs, the system will try to allocate more memory resources than it can handle. This results in an out-of-memory error and an error code that looks something like 0x0000001e (the reason behind this cryptic number will be explained later) and an error message that says “the application has requested more memory than it was configured to allow.”
In this article, we learnt more about the multiple reasons why stop code memory management error occurs and how to fix it.
The stop code memory management error is a common error in Windows 10 that can be caused by different reasons. In this article, we learn more about the multiple reasons why this stop code occurs and how to fix it.
- If you have ever seen this message “Stop Code: 0xc0000005 (0x00000000, 0x00000000, 0x00000000)” on your computer screen when you open an app or try to open a file and then click on Cancel button, then you probably have faulty RAM modules installed inside your computer which are causing this issue. It means that something has gone wrong with the memory management system of your PC or laptop due to faulty component parts such as RAMs getting damaged during shipping or while installing them into the motherboard etc., but it’s still possible that there might be other reasons behind such issues as well such as malware infection etc., so make sure that all hardware components within your system are working properly before replacing any part(s).
Conclusion
So, these are some of the common reasons for memory management error in Windows 10. Hope you find it helpful and fix your problem.